
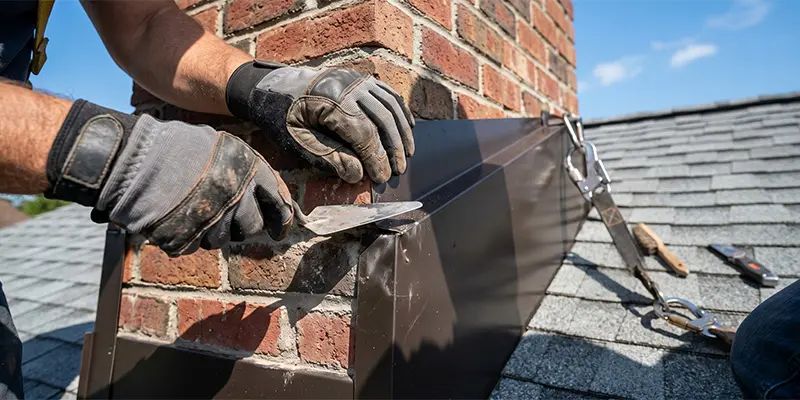
How to Identify and Fix Chimney Flashing Leaks Before They Ruin Your Ceiling
Discovering a brown water stain spreading across your living room ceiling is a stressful experience for any homeowner. While it is natural to assume you have a failing roof, the actual culprit is frequently found at the exact point where your roof meets your fireplace exhaust system. The intersection where your masonry chimney penetrates the roofline is the single most vulnerable point for water intrusion on your entire house. The architectural seal that protects this critical junction is known as chimney flashing.
For homeowners in Lakewood and the surrounding Denver area, a watertight chimney is not a luxury, it is an absolute necessity. Our climate features heavy spring rainstorms, massive winter snow accumulations, and rapid temperature shifts that test the limits of exterior building materials. When chimney flashing fails, water does not just drip into your firebox. It travels silently along your roof decking, soaking your insulation, rotting your wooden framing, and destroying your interior drywall. Understanding how this metal barrier works and recognizing the early signs of failure can save you thousands of dollars in structural repairs.
The Anatomy of Proper Chimney Flashing
To understand why a leak occurs, you must first understand how a correct flashing system is constructed. A professional flashing job is never just a single piece of metal glued to the side of the brick. Because a house and a chimney are built on separate foundations, they settle, shift, and expand at different rates. If a single piece of rigid metal were nailed to both the roof and the brick, it would instantly tear apart the moment the house shifted.
To account for this movement, proper flashing is installed as a two-part overlapping system. The first component is the step flashing. These are L-shaped pieces of sheet metal that are woven directly into the roofing shingles. One side of the L lies flat under the shingle, and the other side bends up against the side of the chimney brick.
The second component is the counter flashing. This metal shield is embedded directly into the mortar joints of the chimney and folds downward, overlapping the step flashing like an umbrella. This ingenious two-part design allows the chimney and the roof framing to move independently while maintaining a watertight seal. According to InterNACHI structural standards, this overlapping method is the only code-compliant way to guarantee long-term water resistance at roof penetrations.
Signs Your Flashing System is Failing
Because flashing is located high up on your roof, the initial stages of failure are usually invisible from the ground. Homeowners typically only realize there is a problem when the water has already caused secondary damage inside the home. However, if you know what to look for, you can catch the warning signs early.
The most obvious sign is water pooling inside your firebox after a heavy rainstorm. If you open your damper and hear dripping, or if you notice fresh rust forming on your fireplace grate or metal damper plate, water is actively entering the system. You may also notice a strong, musty odor radiating from the hearth, which indicates that trapped moisture is allowing mold and mildew to breed inside the dark masonry column.
If you have access to your attic, take a flashlight and inspect the wooden rafters and decking surrounding the chimney stack. Look for dark water stains, soft spots in the wood, or damp fiberglass insulation. Even a minor flashing leak can trigger severe mold infestations in your attic if left untreated. Catching the leak at the attic level allows you to schedule repairs before the water breaks through your finished ceiling below and triggers a costly interior renovation.
Why the Colorado Climate Destroys Flashing
Even the highest quality sheet metal is subjected to intense environmental stress. The primary enemy of flashing in Colorado is the freeze-thaw cycle. The counter flashing is secured by grinding a channel into the chimney mortar, inserting the metal lip, and sealing the gap with a specialized polyurethane caulk. Over several years, extreme winter cold causes the brick and mortar to expand and contract. This relentless thermal movement eventually breaks the sealant bond, allowing melting snow to slip behind the metal plate.
Furthermore, gale-force winds common in our region can physically lift and bend older, lightweight aluminum flashing. Once a single corner is bent upward, wind-driven rain will blow horizontally under the overlapping layers. Finally, the intense ultraviolet radiation at our higher elevations rapidly degrades inferior caulking, causing it to dry out, shrink, and crack away from the masonry in just a few short years.
The Danger of the “Tar Trap”
When faced with a flashing leak, many well-meaning homeowners, and unfortunately some inexperienced handymen, reach for a bucket of black roofing cement or roofing tar. They climb onto the roof and slather a thick, ugly layer of tar over the entire intersection of the roof and the chimney. This is the worst possible approach to masonry repair.
Roofing tar is not designed to bond with vertical brick surfaces. Within a single season, the sun will bake the tar, causing it to crack and pull away from the chimney. Once it cracks, the thick layer of tar actually creates a shelf that catches rainwater, trapping it against the brick and forcing it directly into the masonry. Applying roofing tar over a leaking chimney is a temporary band-aid that drastically accelerates water damage and makes the eventual professional repair much more difficult and expensive. To fix the problem correctly, a technician must painstakingly scrape and grind away all the old tar before the new metal can be properly installed.
The Professional Repair Process
Fixing a compromised flashing system requires a unique blend of roofing knowledge and masonry expertise. This is why you should always rely on a certified chimney professional rather than a general roofer. A chimney sweep understands exactly how to cut into the historical mortar joints without shattering the surrounding bricks or compromising the structural integrity of the exhaust column.
The repair process begins by carefully removing the degraded counter flashing and grinding out the old mortar and failing sealants. Next, custom-bent pieces of high-grade galvanized steel, aluminum, or copper are fabricated on-site to match the exact pitch and dimensions of your roofline. The new metal is seated deeply into the newly ground mortar joints. Finally, the system is locked into place using masonry fasteners and sealed with an industrial-grade, flexible elastomeric sealant that is specifically formulated to withstand decades of thermal expansion.
Comprehensive Waterproofing and Protection
While upgrading your flashing is a critical step, it is only one part of a comprehensive water defense strategy. Water is relentless, and if it cannot enter through the flashing, it will look for other weak points. It is highly recommended to combine a flashing upgrade with comprehensive chimney leak repair to ensure the entire system is secure.
During a professional service call, technicians will also evaluate the top of the stack. A cracked concrete cap can allow water to bypass the flashing entirely by traveling down the internal core of the masonry. Investing in preventative chimney crown repair ensures that the horizontal surfaces of your chimney are shedding water correctly. By sealing the crown, waterproofing the vertical bricks, and installing custom metal flashing, you create an impenetrable barrier against the elements.
Protect Your Home Today
A chimney flashing leak is not an issue that will resolve itself. Every time it rains, more water enters your structural framing, increasing the risk of wood rot and hazardous biological growth outlined in EPA guidelines on indoor mold growth. If you suspect your flashing has failed, or if you simply want peace of mind before the heavy winter snows arrive, do not wait for your drywall to cave in. Rely on experienced chimney professionals to diagnose the exact entry point and install a custom metal barrier that will protect your home and your family for decades to come.






Leave A Comment